Easy DIY Doll or Elf Onesie Costume
It's October, which means that many people are searching for and crafting their own costumes! For day 7 of my All Wrapped Up series, I want to share an easy one-piece costume you can make for your dolls or elves. It is hand-sewn and uses less than 1/4 of a yard of fleece and a bit of velcro, plus whatever notions or extra fabric you want to use for accessories.
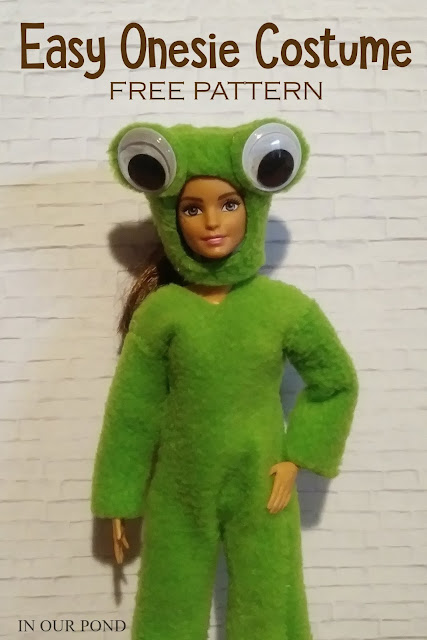
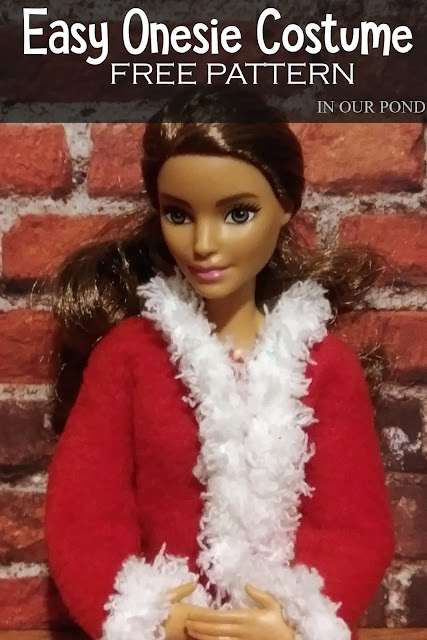
The main part of the onesie is created by using 3 cut pieces of fabric, one large full-body piece and two half pieces (right and left). You can plan for the onesie to open on either the front or the back depending on your costume design. For this frog, I had the costume open in the back, but for a Santa suit, I had it open in the front.
To create this particular doll onesie, I searched out frog costumes for ideas. Many of the store-bought designs had a yellowish panel on the belly. I decided not to add that part and to leave the tummy solid green. You, of course, could do whatever you want.
The frog head is a 2x5 piece of fleece fabric that was folded in half and sewn to make a 2" tall tube. I refolded the tube in half so that the first seam was in the back and sewed one side together. Next, I placed the mask on the doll and checked placement for the face. I freehand cut the circle out, but you could also leave the hat solid and place it higher on the doll's head. To make the eyes, I hot glued google eyes onto a scrap of fleece and cut them out and hot glued them to the corners of the mask.

> > > Get the Pattern Here! < < <
Supplies:
- 1/4 yard fleece
- packing tape
- sewing scissors
- pattern
- hand sewing needle
- sewing thread
- sew-on velcro
Cut the paper patterns for the onesie out of the paper (one full front and two halves). With packing tape, secure the three pattern pieces onto the wrong side of the fleece (with the stretch to the sides) and cut out with sharp scissors. Stack pieces good side to good side, matching up the pieces. You can pin the pieces, but they're pretty easy to sew without pinning since the material is stretchy and can be manipulated.
I begin by sewing from the armpit down the leg on both sides, stopping a few inches from the bottom. Then I sew across the tops of the shoulders and try the onesie on the doll for length. Cut the legs to the correct length and then finish sewing up the outside of the legs and the inseam.
To make the sleeves, measure the length of the dolls arm and cut a rectangle of fabric 1 to 1 1/2 inches by the length of the doll's arm. Cut a second identical one. Fold one rectangle in half longways and sew the long edges together, then attach it to the sleeve hole. I stick my finger in the arm hole and into the sleeve to hold it steady while I sew it. Repeat the process for sleeve number two.
To attach the velcro, I use my sewing machine to put one side of the velcro on one half of the onesie and the other side of the velcro on the other half. The velcro can be hand sewed or glued as well. And you're done!
As I mentioned before, this onesie pattern can be used to create many other designs. Add feet to it to make footie pjs. Or connect the hood to make a unicorn, deer, or other animal. For our elf, I've been making Christmas costumes. I had the red onesie open in the front, added white fur trim and a belt to make a Santa suit. For a gingerbread man, I put gumdrop buttons and white rick rack on brown felt. They're a warm, comfy outfit for the doll on a cold winter's night.
This project was inspired by my favorite doll crafter, My Froggy Stuff. Here's her doll onesie video for visual instructions. Please show her some love by subscribing to her videos.
If you love DOLL CRAFTING like I do, join our Doll Crafting FB group!

Visit all the Posts in the Series
Click on the Picture Below!
Click on the Picture Below!
Pin It!


Comments
Post a Comment
Thank you for commenting!